Locker Refurbishment UK: Doors, Locks, Repainting & Upgrades
May 13, 2026
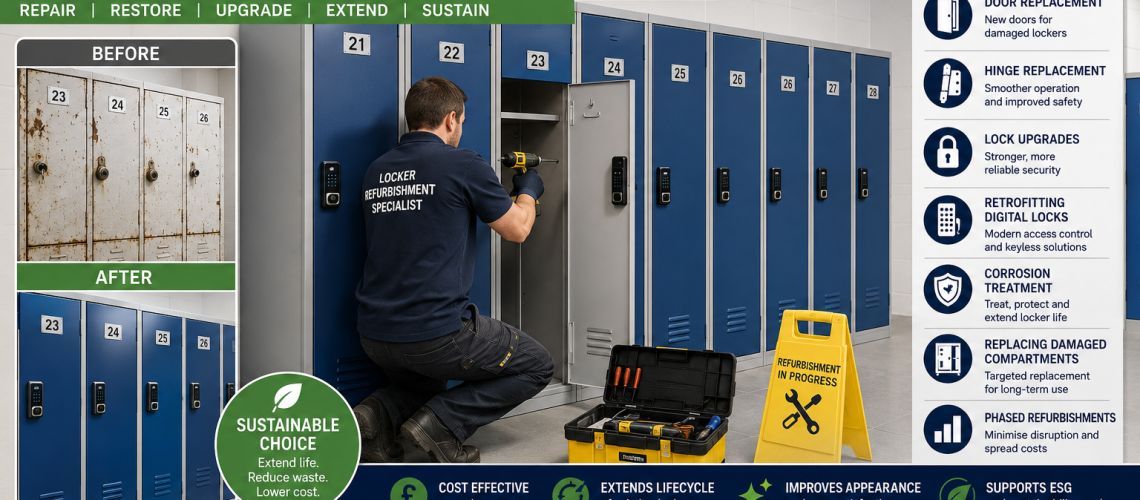
Locker refurbishment is the planned renewal of an existing locker installation after the organisation has already decided that the main locker structure is worth retaining.
The refurbishment project then turns that approved decision into practical work: defining the scope, identifying compatible parts, trialling uncertain repairs or conversions, sequencing the work, managing disruption, completing the refurbishment to a defined standard and returning the lockers to service with accurate records.
This page does not start with an unidentified fault. Use the Locker Parts & Servicing Guide to diagnose faults and decide whether the next step is component repair, planned servicing, refurbishment or replacement. Physical condition evidence across a wider locker estate should come from Locker Estate Audit UK.
Parts & Servicing identifies when a fault has moved beyond routine repair. Locker Refurbishment then defines and delivers the approved renewal work.
Refurbishment can include replacement doors, hinges, locks, keys, numbering, shelves, hooks and other fittings, surface preparation, repainting, local corrosion treatment and compatible access-control upgrades where these are already part of the approved scope.
Quick Answer: What Is Locker Refurbishment?
Locker refurbishment is the coordinated repair and renewal of a locker installation that has already been judged suitable for retention.
- Confirm the approved refurbishment scope.
- Identify the locker range, construction and existing components.
- Check parts and lock compatibility.
- Test representative repairs or conversions where required.
- Define the finish and workmanship standard.
- Plan access, emptying, isolation and temporary storage.
- Sequence or phase the work.
- Complete doors, hinges, locks, fittings and surface work.
- Inspect the completed refurbishment.
- Update asset, lock and maintenance records.
- Return the lockers to service.
If the fundamental question is still whether refurbishment is appropriate at all, return to the Locker Parts & Servicing Guide and use estate-condition evidence where required before committing to a refurbishment project.
Repair vs Refurbishment vs Replacement
| Condition | Typical route |
|---|---|
| One failed key, lock, hinge, cam or fitting | Parts or servicing |
| Several worn components but sound locker structure | Refurbishment |
| Locker bank needs coordinated doors, locks, numbering, finish or fitting renewal | Refurbishment |
| Structural corrosion, unstable frames or unsuitable retained layout | Replacement planning |
| Condition is unclear across a wider estate | Estate audit |
What Locker Refurbishment Owns
| Refurbishment subject | Ownership |
|---|---|
| Approved refurbishment scope | This guide |
| Parts identification for the refurbishment | This guide |
| Door and hinge renewal | This guide |
| Lock replacement within the approved scope | This guide |
| Lock conversion trial and implementation | This guide |
| Replacement keys within the refurbishment project | This guide |
| Numbering and identification renewal | This guide |
| Shelves, hooks and internal fittings | This guide |
| Surface preparation and repainting | This guide |
| Local corrosion treatment on retained assets | This guide |
| Representative trial repairs | This guide |
| Work sequencing and phasing | This guide |
| Temporary access during refurbishment | This guide |
| Completion inspection | This guide |
| Record updates and return to service | This guide |
What Locker Refurbishment Hands Off
| Question | Use this guide |
|---|---|
| Is the problem a key, lock, hinge, door or other serviceable component? | Locker Parts & Servicing Guide |
| What is the verified physical condition across the locker estate? | Locker Estate Audit UK |
| Has the locker estate reached the point where renewal is required? | Locker Replacement Planning UK |
| What quantity, layout or locker dimensions should a new scheme use? | Locker Planning UK |
| Which key, PIN, RFID or digital access method should be selected? | Locker Access Control Systems UK |
| How is a failed locker lock physically replaced? | Locker Lock Replacement Guide UK |
| What is the wider estate status after refurbishment? | Locker Estate Management UK |
| Does an accessibility or room-layout problem need redesign? | Accessible Locker Planning UK |
Start With an Approved Refurbishment Scope
Refurbishment should begin with a defined scope rather than an open instruction to “make the lockers better”. The scope should identify which locker banks are included, which components are being retained, which components are being renewed and the standard expected at completion.
- Site, building, room or area.
- Locker-bank or asset references.
- Number of units and compartments in scope.
- Locker manufacturer or range where known.
- Door material and construction.
- Existing lock type.
- Parts to be retained.
- Parts to be replaced.
- Surface-work requirement.
- Numbering requirement.
- Access-system changes already approved.
- Completion standard.
- Phasing or programme constraints.
A defined scope prevents a refurbishment project expanding unpredictably into a full redesign or replacement scheme.
Confirm the Locker Before Ordering Parts
Locker parts are not universally interchangeable. Before ordering doors, hinges, locks, shelves or other components, identify the existing locker as accurately as possible.
- Manufacturer or range where identifiable.
- Locker height, width and depth.
- Compartment configuration.
- Door material and thickness.
- Hinge arrangement.
- Lock preparation and fixing method.
- Existing cam, latch or locking mechanism.
- Internal shelf or hook fixing positions.
- Numbering style.
- Colour or finish where visual matching matters.
Where parts are difficult to identify, use photographs of the complete locker, door, hinge, lock face, rear lock mechanism and visible labels or markings. Browse the current replacement locker parts range or use the Locker Parts & Servicing Guide for identification and service routing.
Use a Representative Trial Before Large-Scale Work
A representative trial is one of the strongest controls in a large refurbishment project. It can prove the intended repair, replacement part, paint system or lock conversion before the same work is repeated across dozens or hundreds of compartments.
- Test one representative door replacement.
- Test the proposed hinge or fixing arrangement.
- Test one lock replacement or conversion.
- Check cam or latch engagement.
- Check door clearance and rear lock clearance.
- Check surface preparation and finish.
- Check numbering and identification.
- Confirm that the completed locker operates as intended.
- Record any adjustment needed before rollout.
A small compatibility problem is easier to correct in a trial than after a large quantity of parts has been ordered.
Locker Door Refurbishment and Replacement
Locker doors often receive more wear and impact than the main carcase. Where the locker has been approved for refurbishment and the cabinet remains structurally suitable, the scope may include repairing or replacing individual doors.
- Dented or distorted doors.
- Damaged laminate or other door material.
- Failed hinge mounting.
- Damaged lock apertures.
- Missing or damaged ventilation features.
- Worn identification or numbering.
- Surface damage requiring preparation and refinishing.
Replacement doors should be checked for dimensions, hinge position, lock preparation, thickness, ventilation pattern, colour and compatibility with the existing locker frame.
Hinge Replacement and Door Alignment
Loose, worn or damaged hinges can prevent doors closing correctly even where the rest of the locker remains serviceable.
- Tighten or renew suitable fixings.
- Replace damaged hinges with compatible parts.
- Check hinge mounting points before fitting replacements.
- Correct door alignment where the frame remains sound.
- Check lock and cam engagement after alignment work.
- Confirm that repaired doors open and close consistently.
If the trial shows that the frame itself is distorted or the hinge mounting points cannot support a reliable repair, stop the refurbishment on that asset and return the evidence to the Parts & Servicing or Estate Audit process rather than expanding the scope blindly.
Lock Replacement Within a Refurbishment Project
A refurbishment project may include replacement of failed or worn locks where the existing access method remains suitable.
- Confirm the existing lock type.
- Check door thickness.
- Check cut-out or fixing pattern.
- Check rear clearance.
- Check cam length, offset and rotation.
- Check latch engagement with the locker frame.
- Confirm any master-key or management-access requirement.
- Check whether the replacement preserves the existing key or management strategy where required.
For the detailed physical replacement process, use the Locker Lock Replacement Guide UK.
Access-Control Upgrades Within Refurbishment
A refurbishment can include a change from one access method to another, but refurbishment should implement an approved access choice rather than becoming the page that selects the technology.
Possible approved conversions can include:
- keyed lock to hasp fitting;
- keyed lock to mechanical combination;
- keyed lock to electronic PIN;
- keyed or mechanical access to RFID;
- or replacement of an obsolete electronic lock family with a supported alternative.
Use Locker Access Control Systems UK to choose the access technology. This refurbishment page owns the practical implementation once that choice has been made.
Test Lock Conversions Before Rollout
Do not assume that a different lock technology will fit because the front dimensions appear similar.
- Check the door cut-out.
- Check fixing holes.
- Check door thickness.
- Check spindle or lock-body depth.
- Check cam or latch travel.
- Check clearance behind the door.
- Check shelves or stored contents do not obstruct the mechanism.
- Check battery access on electronic locks.
- Check management or emergency-access operation.
- Check the finished door remains presentable after any adaptor or conversion work.
Where the existing door needs modification, prove the conversion on a representative locker before ordering the full quantity.
Replacement Locker Keys During Refurbishment
Do not replace a serviceable keyed lock simply because the original user key is missing. Where the manufacturer and key code can be identified, a replacement key may restore the locker with less work and less disruption.
Use the replacement locker key service for cut-to-code keys where the correct series and code are known.
Numbering and Identification Renewal
Refurbishment is a useful opportunity to correct damaged, missing or inconsistent locker identification.
- Confirm the numbering sequence before removal.
- Keep physical locker numbers separate from key numbers.
- Use a stable format across the area where practical.
- Replace damaged number plates, discs or labels.
- Update estate or allocation records where physical numbers change.
- Check that new numbers remain visible after repainting or door replacement.
Numbering should improve identification without creating a second asset-ID structure that conflicts with the estate register.
Shelves, Hooks and Internal Fittings
Internal components can often be renewed independently of the locker carcase.
- Replacement shelves.
- Coat hooks.
- Hook boards.
- Hanging rails where used.
- Internal dividers.
- Numbering or identification components.
- Compatible lock cams and small fittings.
Identify fixing positions and component dimensions before ordering. Visually similar parts from different locker ranges may not be interchangeable.
Surface Preparation and Repainting
Repainting can renew appearance and surface protection on approved refurbishment candidates, but paint should be treated as a finish rather than a structural repair.
- Clean the surface appropriately.
- Remove loose or failed coating.
- Prepare damaged areas.
- Treat local corrosion where the retained metal remains suitable.
- Use a coating system compatible with the substrate and existing finish.
- Protect locks, hinges, labels and moving parts during application.
- Allow the coating to cure before returning doors to normal use.
If surface preparation exposes wider metal loss, perforation or structural deterioration that was not identified in the original scope, stop work on that asset and return the evidence to Estate Audit or the Parts & Servicing Guide.
Corrosion Treatment on Retained Lockers
Local corrosion treatment belongs within refurbishment only where the asset has already been approved for retention and the affected metal remains suitable for treatment.
- Identify the source of moisture or chemical exposure where possible.
- Check bases, lower door edges, seams and fixing points.
- Remove loose corrosion products appropriately.
- Prepare the retained surface.
- Use a suitable protective finish.
- Correct avoidable environmental causes where the refurbishment scope allows.
Widespread structural corrosion is not a surface-refinishing problem. If the actual condition differs materially from the approved refurbishment evidence, send the asset back for condition review through Estate Audit or the Parts & Servicing Guide.
Define the Refurbishment Finish Standard
Before work starts, define what completion is supposed to mean. A refurbishment intended to restore mechanical reliability can have a different finish requirement from a reception, office or school corridor where consistent appearance is also important.
| Completion area | Example requirement |
|---|---|
| Doors | Open, close and align consistently |
| Locks | Operate reliably with the approved user and management method |
| Hinges | Secure, aligned and free from excessive movement |
| Numbers | Present, legible and consistent with records |
| Internal fittings | Required shelves, hooks and components present |
| Surface finish | Prepared and finished to the agreed visual/protective standard |
| Corrosion work | Treated areas completed with no unresolved structural concern |
| Access upgrade | Representative and completed locks tested for intended operation |
| Records | New parts, lock details and completion status recorded |
Plan User Access and Disruption
Refurbishment work can take lockers out of service temporarily. Plan how users, belongings and operational access will be managed before work begins.
- Which lockers need to be emptied?
- Who is responsible for notifying users?
- How will personal belongings be removed or transferred?
- Are temporary lockers required?
- Can the work be completed outside peak periods?
- How will work areas be isolated?
- What happens to keys or credentials during lock changes?
- How will the completed lockers be handed back?
User reassignment and formal allocation changes belong in Locker Management Systems UK. The refurbishment programme should coordinate with that process rather than creating an informal parallel allocation system.
Phased Locker Refurbishment
Large refurbishment projects can be completed in phases where this reduces disruption or allows the organisation to test the standard before wider rollout.
- One room or locker bank at a time.
- One building or department at a time.
- One lock family or door type at a time.
- Priority areas first where the approved programme identifies operational need.
- Trial phase followed by larger rollout.
- Out-of-hours or holiday work where appropriate.
Keep the same approved parts, finish, numbering and lock specification across phases unless a documented change is made after the trial.
Control Variations During the Project
Refurbishment often reveals hidden conditions once locks, doors or coatings are removed. Define how variations will be handled before the work expands beyond the original scope.
- Unexpected frame distortion.
- Hidden corrosion.
- Different lock preparation within the same locker bank.
- Previous non-standard repairs.
- Unidentified replacement doors.
- Missing or incompatible internal components.
- Different hinge arrangements.
- Previously unrecorded access-system variations.
A variation should be recorded and assessed. Do not force a planned refurbishment method onto an asset that turns out to be materially different from the approved candidate.
Completion Inspection
Before refurbished lockers return to normal use, inspect the completed work against the agreed scope and finish standard.
- Doors open and close correctly.
- Hinges and fixings are secure.
- Locks operate correctly.
- Cams or latches engage properly.
- Management access works where required.
- Replacement keys or credentials are correct.
- Numbering is complete.
- Shelves, hooks and fittings are installed.
- Surface work is complete.
- No new sharp edges, loose parts or obstructions have been introduced.
- Temporary work materials have been removed.
- Asset and maintenance records are ready to update.
Update Records After Refurbishment
Refurbishment changes the physical estate and should therefore leave a record of what changed.
- Asset or locker-bank reference.
- Date completed.
- Doors or major components replaced.
- New lock type or model where changed.
- Key or credential references where appropriate.
- New numbering where changed.
- Surface or corrosion work completed.
- Parts used.
- Outstanding exceptions.
- Return-to-service date.
Return the completed status to Locker Estate Management UK. Where work orders are managed through facilities software, close or update them through the CAFM process.
Return Refurbished Lockers to Service
A refurbished locker should not return to the available pool simply because the physical work has finished.
- Completion inspection passed.
- Lock and access state confirmed.
- Numbers and records updated.
- Temporary isolation removed.
- User or allocation process ready.
- No unresolved defect prevents normal use.
- Relevant keys or credentials are available.
Operational reassignment and return to availability should then follow the site’s normal Locker Management process.
School Locker Refurbishment
Once school lockers have been approved for refurbishment, the delivery programme may include doors, hinges, locks, numbering, internal fittings and surface work.
- Use holidays or quieter periods where this reduces disruption.
- Keep year-group or location numbering consistent.
- Trial lock conversions before changing large numbers of doors.
- Separate missing keys from failed lock hardware.
- Record vandalism-related damage separately from normal wear.
- Update the school’s allocation or key records after completion.
If the real problem is corridor congestion, pupil allocation, compartment size or location, use School Lockers UK and the relevant planning guidance rather than expanding the refurbishment scope into a redesign.
Workplace Locker Refurbishment
Approved workplace refurbishment can modernise an existing locker estate without changing the underlying quantity or layout.
- Renew damaged doors and hinges.
- Standardise replacement locks where the approved access model requires it.
- Replace inconsistent numbering.
- Renew worn fittings.
- Refresh suitable finishes.
- Complete access upgrades already justified through the access-control process.
- Coordinate work with staff moves or quieter attendance periods.
Where hybrid working or organisational change has made the quantity or location wrong, return the requirement to planning or occupancy management rather than treating refurbishment as a capacity project.
NHS and Healthcare Locker Refurbishment
Healthcare staff locker refurbishment should deliver the approved work while protecting access to changing facilities and maintaining a clear handover back into service.
- Plan work around departments and shift patterns where required.
- Provide temporary storage where affected staff still need secure storage.
- Renew damaged coatings and suitable local surface defects.
- Replace failed doors, hinges and fittings within the approved scope.
- Replace or upgrade locks only after compatibility has been confirmed.
- Keep accessible positions available where they are part of the existing requirement.
- Coordinate cleaning access and final handover.
- Update lock, numbering and estate records after completion.
If the underlying staff-changing workflow, department arrangement, shift overlap or room layout needs redesign, use NHS & Healthcare Changing Room Planning UK.
Industrial Locker Refurbishment
Industrial refurbishment projects may need to work around shifts, PPE storage, contaminants, heavy use and restricted maintenance windows.
- Confirm the retained locker material remains suitable for the environment.
- Use compatible robust replacement parts.
- Check doors and locks after repeated impact or heavy use.
- Treat local corrosion within the approved scope.
- Protect work from dust, contaminants or wet conditions where required.
- Sequence the project so staff retain necessary storage.
- Update parts and lock references after completion.
Leisure and Wet-Area Locker Refurbishment
Where wet-area or leisure lockers have already been approved for refurbishment, parts and finishes should remain suitable for the actual moisture, cleaning and user environment.
- Check corrosion around bases, hinges, lock apertures and seams.
- Use compatible wet-area lock components where required.
- Renew coin, hasp, keypad or RFID hardware within the approved access specification.
- Check wristband or credential operation where used.
- Keep cleaning and drainage routes accessible.
- Check doors and hinges after the work because high-turnover use can expose poor alignment quickly.
Refurbishment and Accessibility
Refurbishment can correct damaged or difficult components, but it should not be presented as solving a layout-level accessibility problem unless the actual barrier is addressed.
- Replace damaged locks or handles where the approved solution improves operation.
- Keep identification clear and legible.
- Check accessible positions remain unobstructed during and after the work.
- Do not move benches or lockers in a way that creates a new approach or manoeuvring problem.
- Where position, reach, route or door swing is the underlying issue, hand the problem back to planning.
Use Accessible Locker Planning UK for approach routes, manoeuvring space, reach, door operation and layout-level accessibility questions.
Refurbishment and Resource Efficiency
Where condition evidence and servicing assessment show that the locker structure remains worth retaining, refurbishment can extend the useful life of existing assets and reduce premature disposal.
The strongest resource-efficiency case is therefore not simply “reuse is better”. It is that a suitable existing asset can be retained while failed components are replaced and the known problem is actually resolved.
Do not expand an approved refurbishment on sustainability grounds if newly discovered evidence shows the retained structure is unsuitable. Return the asset to condition review and, where renewal is required, move into replacement planning.
A Practical Locker Refurbishment Workflow
- Receive the approved refurbishment decision. Confirm which assets are authorised for refurbishment and the evidence supporting retention.
- Define the scope. List locker banks, components and required finish.
- Confirm identification. Record manufacturer, dimensions, door and lock details.
- Identify parts. Confirm doors, hinges, locks, keys, shelves, hooks and other components.
- Test representative work. Prove uncertain repairs, lock conversions or finishes.
- Freeze the refurbishment standard. Confirm approved parts, colours, numbering and access method before rollout.
- Plan disruption. Arrange emptying, temporary storage and work-area access.
- Phase the work. Divide large projects into controlled sections where useful.
- Carry out mechanical refurbishment. Doors, hinges, locks, fittings and alignment.
- Carry out surface work. Preparation, local corrosion treatment and finishing.
- Control variations. Escalate hidden conditions that change the approved premise.
- Inspect completion. Test operation and check the finish standard.
- Update records. Record parts, locks, numbering and completion.
- Return to service. Hand the lockers back through the operational management process.
Locker Refurbishment Project Checklist
- Has the refurbishment decision already been supported by fault and condition evidence?
- Are all locker banks in scope clearly identified?
- Is the locker manufacturer or range known where possible?
- Are door dimensions and materials confirmed?
- Are hinge types and fixing points confirmed?
- Is the existing lock identified?
- Are replacement parts compatible?
- Has any lock conversion been trialled?
- Have representative doors or repairs been tested where required?
- Is the finish standard defined?
- Is the numbering standard defined?
- Are parts and quantities documented?
- Is access for users during the work planned?
- Are temporary lockers required?
- Is the phasing sequence agreed?
- Is there a process for unexpected hidden defects?
- Will each completed lock be tested?
- Will doors and hinges be checked after completion?
- Will asset and maintenance records be updated?
- Is the return-to-service process defined?
Common Locker Refurbishment Mistakes
- Using the refurbishment page to diagnose unidentified faults. Start with the Parts & Servicing Guide and condition evidence first.
- Ordering parts before identifying the locker.
- Assuming visually similar doors or hinges are interchangeable.
- Changing access technology without a separate access-control decision.
- Rolling out an untested lock conversion across the whole estate.
- Painting over active corrosion or failed coatings without preparation.
- Ignoring hidden frame or hinge damage exposed during the work.
- Allowing project variations to expand without review.
- Failing to plan where users put belongings during the work.
- Returning lockers to service before locks and doors are tested.
- Changing numbering without updating records.
- Leaving new lock or key information out of the estate record.
- Treating refurbishment as a substitute for layout redesign.
Related Locker Refurbishment Guides
- Locker Parts & Servicing Guide – diagnose faults, identify components and decide whether routine repair is sufficient.
- Locker Estate Audit UK – verify physical condition and record evidence across larger estates.
- Locker Replacement Planning UK – plan phased renewal when lockers should no longer be retained.
- Locker Lock Replacement Guide UK – physical lock replacement and compatibility checks.
- Locker Access Control Systems UK – choose key, PIN, RFID and digital access technology.
- Locker Estate Management UK – maintain the wider estate status after refurbishment.
- Locker Planning UK – own new quantity, dimensions, layout and location decisions.
Locker Parts, Keys and Service Support
Once the refurbishment scope is defined, use the most specific route for the component or service required. Total Locker Service supplies replacement locker parts, locks and keys and can help identify unfamiliar components from photographs, measurements and markings.
- Replacement Locker Parts – doors, hinges, shelves, hooks, number plates and other components.
- Locker Locks – keyed, hasp, coin, combination, electronic and RFID options.
- Replacement Locker Keys – cut-to-code keys where the correct lock series and code can be identified.
- Identify a Locker Part – send photographs and measurements for unknown components.
- Locker Parts, Repairs & Service Support – wider repair and servicing support.
If work exposes evidence that the lockers are no longer suitable for retention, stop expanding the refurbishment scope, record the condition evidence and move the asset into replacement planning where appropriate.
Locker Refurbishment UK FAQs
What is locker refurbishment?
Locker refurbishment is the planned renewal of an existing locker installation that has already been approved for retention. Work can include doors, hinges, locks, keys, numbering, fittings, surface preparation, local corrosion treatment and repainting.
How do you decide whether lockers should be refurbished or replaced?
Use fault diagnosis, maintenance history and physical-condition evidence to decide whether the lockers remain suitable for retention. Isolated component faults normally stay with parts and servicing; coordinated renewal of sound lockers becomes refurbishment; structurally unsuitable assets should move into replacement planning.
What should be checked before ordering locker refurbishment parts?
Confirm the locker manufacturer or range where possible, dimensions, door material, hinge arrangement, lock preparation, existing lock, internal fittings and fixing positions before ordering replacement components.
Should a lock conversion be tested before refurbishing a large locker estate?
Yes. Where compatibility is uncertain, test the proposed lock or conversion on a representative locker first. Check door preparation, fixing points, clearance, cam or latch operation and the intended user and management access before wider rollout.
Can locker doors be replaced without replacing the whole locker?
Often yes, where the retained locker frame remains suitable and compatible replacement doors are available. Check door dimensions, hinge position, lock preparation, thickness, ventilation and fit before ordering.
Can old lockers be upgraded with electronic or RFID locks during refurbishment?
Sometimes. The access technology should be selected separately, then the refurbishment project should prove physical compatibility through the door cut-out, thickness, fixings, rear clearance, cam or latch movement, battery access and representative testing.
Can corroded lockers be refurbished?
Local corrosion can form part of an approved refurbishment where the retained metal remains suitable. If preparation exposes wider structural corrosion or significant metal loss, the locker should return to lifecycle review rather than simply being repainted.
What records should be updated after locker refurbishment?
Update the relevant asset or locker-bank reference with the completion date, major components replaced, new lock details where changed, numbering changes, parts used, outstanding exceptions and return-to-service status.
When can refurbished lockers return to service?
Return lockers to service after the agreed refurbishment is complete, doors and locks have been tested, numbering and records are updated, temporary isolation is removed and no unresolved defect prevents normal use.
Summary
Locker Refurbishment should answer one main question: how should an approved refurbishment be delivered consistently and returned to service?
Keep the decision boundary clear. Parts & Servicing diagnoses faults and handles routine corrective work. Estate Audit records wider physical-condition evidence. Access Control chooses locking technology. Refurbishment owns the approved renewal scope, compatible parts, trials, sequencing, doors, hinges, locks, keys, fittings, surface work, completion inspection and handover. Replacement Planning owns assets that should no longer be retained.
For replacement parts, browse Locker Parts, Locker Locks and Replacement Locker Keys. If refurbishment exposes evidence that the retained structure is no longer suitable, stop the work on that asset, record the condition and move it into replacement planning.
Discover more from Blog Total Locker Service
Subscribe to get the latest posts sent to your email.