How to Plan Locker Layouts and Numbering Systems for Easier Management
April 9, 2026
Lockers rarely fail because the doors or locks are inherently bad. More often, the problems start much earlier – at the planning stage. If layouts are awkward, numbering systems are confusing and identification is inconsistent, everyday use becomes harder than it needs to be. Staff spend time explaining where things are, users get frustrated trying to find their locker, and maintenance teams struggle to log and track faults accurately.
This guide focuses on something that is often overlooked: how to plan locker layouts and numbering systems so lockers are easier to use, easier to manage and easier to maintain. It is written for facilities managers, estates teams, project managers and school / leisure / workplace leaders who are involved in new fit‑outs, refurbishments or expansions.
We’ll cover:
- How to analyse your building and users before you start.
- Principles for designing locker banks and layouts.
- Options for numbering schemes and how to choose.
- Practical identification solutions (number plates, signs, maps).
- How to future‑proof layouts and numbering for growth or change.
- Real‑world examples from schools, gyms, workplaces and industrial sites.
1. Why layout and numbering matter
1.1 Everyday friction vs smooth operation
A locker bank that looks neat on a drawing can cause daily friction in real life:
- Narrow aisles make it hard for people to pass each other.
- Door swings clash with benches or opposite lockers.
- Popular banks become overcrowded while others are barely used.
- Numbers are out of sequence, so users constantly walk up and down looking for “their” locker.
By contrast, a well‑planned layout and numbering system:
- Lets people find and access lockers quickly, even at busy times.
- Helps staff explain locations clearly over the phone or radio.
- Makes it easy to log faults by precise locker number and bank.
- Supports future changes — such as adding a new bank or reassigning areas.
1.2 The link to safety, security and maintenance
Good planning isn’t just about convenience. It also affects:
- Safety – enough space to move, no pinch points near doors, clear routes in an emergency.
- Security – well‑lit, visible banks discourage tampering and help staff monitor areas.
- Maintenance – consistent identification means engineers can find the exact locker quickly and track recurring issues.
In other words, layout and numbering are part of your locker system, not an afterthought.
2. Start with understanding your users and building
Before drawing lines on a plan, step back and understand who will use the lockers, how and where.
2.1 Who will use the lockers?
Different user groups have very different patterns:
- Pupils and students – arrive in waves at start/end of day and between lessons; often carry large bags and sports kit.
- Gym members – high peaks around work hours; changing speed matters; wet and dry users may have different needs.
- Staff in offices – mixed use across the day; more interest in privacy and device storage.
- Warehouse or depot staff – shift changes create short, intense locker use periods.
- Healthcare staff – lockers are part of clinical workflows and infection‑control routines.
Write down, in plain terms:
- How many people do you expect in each group?
- When are peak usage times?
- How long will typical locker usage last (minutes, hours, all day)?
- Are lockers personal (long‑term assigned) or shared / short‑term?
This shapes how many lockers you need in each area and how you arrange them.
2.2 Where are the natural locker zones?
Next, look at your building:
- Arrival points – entrances, lobbies, staff entrances, student drop‑off points.
- Changing areas – for gyms, pools, staff welfare, PPE.
- Operational zones – near workshops, warehouses, clean/dirty boundaries.
Try to place lockers:
- As close as practical to where items are needed (staff entrances, changing rooms, preparation areas).
- In routes that people already use, rather than tucked away where they’ll be forgotten.
- In locations that are visible enough for informal supervision, but not in the way of main thoroughfares.
A simple sketch of your floor plan, annotated with expected flows of people at different times of day, is a powerful tool before you start specifying bank sizes and positions.
2.3 Constraints and opportunities
Note any fixed constraints:
- Existing walls, services, fire exits and circulation routes.
- Windows or low ceilings.
- Wet vs dry areas (important for locker materials).
Also identify opportunities, such as:
- Under‑used alcoves or walls that could take a shallow locker run.
- Shared banks that can serve multiple groups (e.g. staff and contractors).
This early work will save you from trying to “force” standard banks into awkward spaces later.
3. Designing locker banks and physical layouts
Once you understand users and spaces, you can plan the physical layout.
3.1 Bank size and orientation
A “bank” is a group of lockers in a block. Key choices:
- How many doors per column – 1, 2, 3, 4, 5, 6 or more, depending on door height.
- How many columns per bank – often between 2 and 6, but can be more in larger rooms.
- Orientation – single‑sided against walls or double‑sided islands.
Consider:
- The height of the top doors for your users — younger pupils and some staff may struggle with high doors.
- Whether you need accessible lockers at specific heights for wheelchair users.
- The visibility of each bank from entrances and staff areas.
A common pattern in schools and workplaces is to mix taller compartments for coats and bags with smaller ones for shoes or personal items. In leisure and gyms, full‑height or half‑height compartments may dominate.
3.2 Aisle widths and circulation
Aisles must be wide enough for:
- Two people to pass comfortably when one has a locker door open.
- Wheelchairs where required.
- Safe movement in emergencies.
As a rule of thumb (always check local building / accessibility guidance):
- 900–1000 mm is an absolute minimum for a single narrow aisle with light use.
- 1200–1500 mm is more comfortable in busier areas or where benches are present.
- Wider aisles may be needed if people will carry large kit bags or trolleys nearby.
Remember to account for door swing:
- Avoid placing lockers directly opposite each other with doors that collide.
- Consider using doors on alternating banks that swing away from each other where space is tight.
3.3 Benches and changing space
In changing rooms and staff welfare areas:
- Benches should be placed to allow people to sit and use lockers, without blocking doors or main walkways.
- Benches parallel to locker runs are common; ensure there is enough clearance between bench and doors for comfortable use.
- In some contexts, integrated bench seating with lockers above can save space while keeping the floor clear.
Always sketch out how many people can realistically occupy the space at once without tripping over each other.
3.4 Grouping by function or user type
It often helps to group banks by:
- User group – staff vs visitors, different departments or year groups.
- Function – clean PPE vs dirty PPE, personal storage vs equipment storage.
- Access level – areas with staff‑only access vs public or member areas.
Clear grouping:
- Makes it easier to assign lockers logically (“Year 9 has Banks A–D in corridor 3”).
- Helps you set different lock types or access rules by area.
- Simplifies maintenance (you know where to go when a specific group reports problems).
4. Numbering systems: principles and options
With the physical layout in mind, you can plan how lockers will be numbered and identified. This is one of the most important decisions for day‑to‑day management.
4.1 What a good numbering system should achieve
A good numbering system:
- Is easy to understand at a glance by users and staff.
- Is unambiguous – no two lockers share the same identifier.
- Reflects the physical layout, so numbers give clues about location.
- Can scale when you add more banks or extend a room.
- Works consistently across your sites (where possible).
If people constantly have to “hunt” for a number, the system needs improvement.
4.2 Simple sequential numbering
The most basic method is to number lockers sequentially:
- Bank 1: 1–20
- Bank 2: 21–40
- Bank 3: 41–60, and so on.
Advantages:
- Easy to implement.
- Works well in small installations.
- Users only need to remember one number.
Limitations:
- As you expand, numbers may no longer reflect physical groupings.
- It can be hard to guess where locker 173 is if numbers loop around rooms.
- Moving banks during refurbishments can break the sequence.
Simple sequences are best in compact areas where all lockers are visible together and future expansion is limited.
4.3 Bank‑based numbering (prefix + door)
Another option is to give each bank an identifier and number within it:
- Bank A: A01–A20
- Bank B: B01–B20
- Bank C: C01–C20
This has several benefits:
- The letter tells you which bank to go to before you worry about the exact number.
- You can add new banks later (D, E, F) without renumbering existing lockers.
- Fault logging becomes more precise (“Bank C locker 07”).
You can use letters, numbers or a combination for banks:
- Letters for banks, numbers for doors – common in changing rooms (“C12”).
- Floor or area codes + door numbers – e.g. “2B‑07” for second floor, zone B, locker 07.
- Room codes plus locker numbers – where each room already has a code.
4.4 Row and column‑based numbering
In some large installations, it is helpful to encode position:
- First digit for row or bay.
- Second and third digits for column or vertical position.
For example:
- 101–106: Row 1, lockers 01–06.
- 201–206: Row 2, lockers 01–06.
This is more common in warehouses, depots or large staff facilities where staff are comfortable with coordinate‑style references. It can be overkill for smaller or more public environments.
4.5 Numbering by floor or area
In multi‑storey buildings, it can be very helpful to include the floor:
- 1xx for first floor (101, 102, 103…).
- 2xx for second floor (201, 202…).
- Or prefix with floor: “1‑023”, “2‑045”.
This supports over‑the‑phone directions (“Your locker is on level 2, number 247”) and helps maintenance teams plan routes more efficiently.
4.6 Avoiding common numbering pitfalls
Whichever model you choose, avoid:
- Duplicate numbers in different areas without a clear area prefix.
- Skipping large ranges without explanation (e.g. jumping from 120 to 300 in the same corridor).
- Using “clever” codes that only make sense to the person who created them.
Aim for plain, predictable patterns that someone new could understand within a minute or two.
5. Identification: plates, signs, maps and digital aids
A numbering system is only useful if it is visible and consistent. That’s where identification comes in.
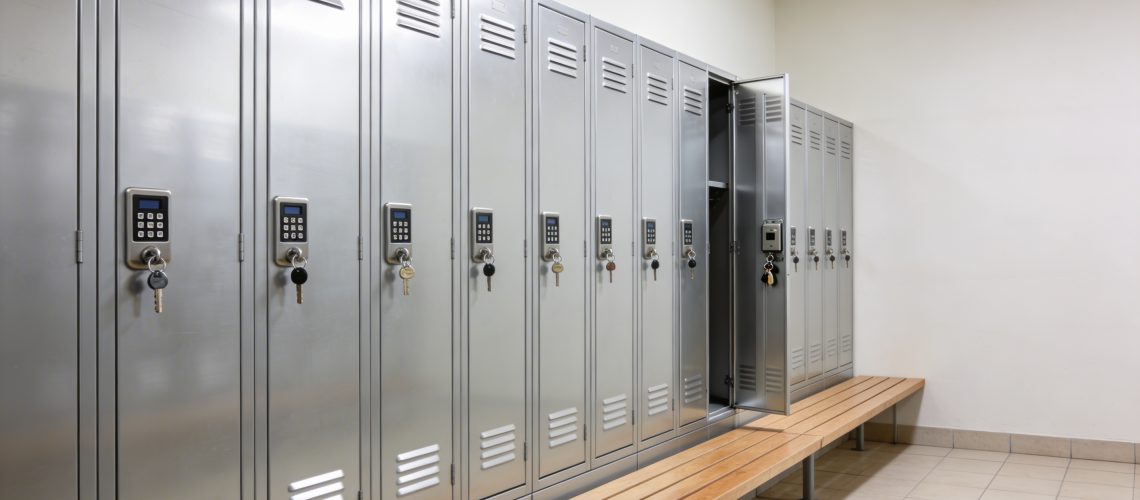
5.1 Number plates and labels
Good number plates should be:
- Clear and legible from a reasonable distance.
- Contrasting enough with the door colour to stand out.
- Robust – engraved or printed materials that don’t peel, fade or crack easily.
- Consistent in size, font and positioning across banks.
Engraved plates or discs are often worth the investment because they:
- Survive cleaning and regular impacts.
- Maintain a professional appearance.
- Support planned numbering changes (you can order new plates in sequence).
Decide where plates will be fixed:
- Top‑centre of the door is common for tall lockers.
- Near the lock for small doors.
- Consistently across all banks to minimise confusion.
5.2 Bank and zone signage
In larger rooms, small locker numbers may not be enough. Add bank or zone signage:
- Large letters or names above each bank (“Bank A – Staff”, “Bank B – Visitors”).
- Colour‑coding (within reason) to distinguish banks or areas.
- Clear signs at entrances explaining which group uses which banks.
The goal is to help users orient themselves quickly, especially at busy times.
5.3 Locker maps and diagrams
For complex installations, consider simple maps:
- A diagram at the entrance showing banks and their labels.
- A small “You are here” symbol.
- Arrows or labels indicating where specific number ranges are.
This is particularly useful in schools, sports centres and large workplaces where new users arrive regularly.
5.4 Digital directories and allocation systems
Where you have smart lockers or digital booking, you can integrate layout and numbering into:
- Web or app‑based interfaces that show which lockers are available and where they are.
- Kiosk screens near locker rooms that display assigned numbers with simple maps.
- Automated messages or emails that tell users both locker number and location description.
Even without full smart systems, a simple PDF map accessible via intranet or QR code can help users find their lockers faster.
6. Planning for growth, change and renumbering
Buildings change. New departments arrive, extension projects add space, and usage patterns shift. A robust layout and numbering plan should allow for growth and change without chaos.
6.1 Leave room in the numbering
When setting up your numbering system:
- Leave gaps in number ranges to accommodate future banks.
- Avoid filling every single number if you can predict expansion.
For example:
- Start with A01–A20 and C01–C20, leaving B for a future bank; or
- Use 100–199 in one room and 200–299 in the next, leaving spare numbers in each range.
This costs nothing now but may save a full renumber later.
6.2 Document the system from day one
Create a simple master document that records:
- Locker bank locations and their identifiers.
- Number ranges in each bank.
- Any special use (e.g. accessible lockers, high‑security lockers).
Share this with:
- Facilities and estates teams.
- Front‑of‑house or reception staff where relevant.
- IT or security teams if integrated with access control.
Good documentation allows you to extend the system consistently when new banks are added.
6.3 Planning for refits and relocations
When you refurbish or relocate banks:
- Decide whether to preserve existing numbers (reducing confusion but possibly breaking perfect sequence) or renumber logically for the new layout.
- Communicate changes well in advance to affected users.
- Where numbers must change, consider temporary dual labelling (“Old 14, now 214”) during a transition period.
If you know large refurbishments are ahead, it may be a good time to move from a legacy ad‑hoc system to a more structured, scalable scheme.
7. Examples from different environments
Sometimes it’s easiest to understand these ideas through examples. Here are a few typical scenarios.
7.1 Secondary school with corridor lockers
A large secondary school has lockers on three floors, mostly in corridors. Historically, lockers were numbered sequentially as banks were added, so:
- Ground floor: 1–120
- First floor: 121–280
- Second floor: 281–430
Over time, new banks have been squeezed into gaps, making it hard to predict where any given number is.
A better system might be:
- Ground floor: G01–G200, split into banks GA, GB, GC…
- First floor: 1A01–1A40, 1B01–1B40, etc., grouped by corridor.
- Second floor: 2A01–2A40, etc.
Signage at each stairwell could list which year groups use which banks, and corridor maps could show GA, GB, GC, etc. Maintenance teams would log faults as “1B‑17 – door bent”, making it clear which floor and corridor to visit.
7.2 Gym changing rooms
A leisure centre has:
- 80 lockers in the dry changing room.
- 120 lockers in the wet poolside changing rooms.
- A mix of full‑height and half‑height compartments.
Instead of running one long sequence from 1–200, they might:
- Use D01–D80 in the dry changing area, with signage “Dry Changing – Lockers D01–D80”.
- Use W01–W120 in the wet changing area, with signage “Poolside Changing – Lockers W01–W120”.
- Add clear bank signs above groups, for example “D01–D20”, “D21–D40”.
Maps at reception and on the website could show the layout and numbering, making it easy for staff to direct visitors.
7.3 Office with staff and hot‑desk lockers
A corporate office has:
- 200 personal staff lockers spread across three floors.
- 60 small hot‑desk lockers near shared work areas.
- Plans to introduce smart access for the hot‑desk lockers but not the staff lockers.
They could:
- Use floor‑based numbering for staff lockers (101–160 on level 1, 201–260 on level 2, 301–340 on level 3).
- Label hot‑desk lockers by zone (“HD‑North‑01” to “HD‑North‑30”, “HD‑South‑01” to “HD‑South‑30”).
- Integrate the hot‑desk numbering into their booking system, so users always see exactly which locker and where it is when they reserve a space.
7.4 Warehouse PPE and tool lockers
An industrial warehouse has:
- Two banks of PPE lockers near the main entrance.
- One bank of tool lockers near the workshop.
- Staff lockers in a welfare area.
To keep things clear:
- PPE lockers might be labelled “PPE‑A01–A24” and “PPE‑B01–B24”.
- Tool lockers could be “TOOLS‑01–TOOLS‑30”.
- Staff lockers could use a simple 1xx numbering in the welfare room.
Large signs (“PPE Lockers – PPE‑A / PPE‑B”) and diagrams at the entrance help supervisors direct staff quickly.
8. Putting your plan into action
Bringing layout and numbering together involves a few key steps:
- Map users and spaces
– Who uses lockers, where and when?
– What items are stored (bags, uniforms, PPE, equipment)? - Sketch layouts
– Decide where banks will go, how large they are, and how people will move around them.
– Check door swings, aisle widths and bench positions. - Choose a numbering model
– Simple sequential, bank‑based, floor/area‑based or a hybrid.
– Ensure it can scale for future changes. - Design identification
– Number plates, bank signs and simple maps.
– Consistent fonts, colours and materials. - Document and communicate
– Create a one‑page overview for facilities teams.
– Brief staff on how to describe locations and log faults.
– Inform users (pupils, members, staff) with signage and simple guides. - Review after go‑live
– After a few weeks, ask staff and users what works and what doesn’t.
– Tweak signage, maps or even renumber small sections if confusion persists.
Done well, this planning process will give you locker layouts and numbering that remain logical and manageable for years – even as user groups change and buildings evolve.
Key Takeaways
Good locker layouts and numbering systems reduce friction and improve safety, user experience and maintenance.
Start by understanding who uses lockers, where and when, then design banks, aisles and benches around real movement patterns.
Use structured numbering schemes (bank‑based, floor/area‑based) rather than ad‑hoc sequences, and always plan for future expansion.
Combine numbering with clear identification: robust number plates, bank signage and simple maps.
Document the system, communicate it clearly and review it after installation so you can refine anything that causes confusion.
Discover more from Blog Total Locker Service
Subscribe to get the latest posts sent to your email.