Locker Room Design UK: Layout, Lockers, Benches and Planning Guide
April 13, 2026
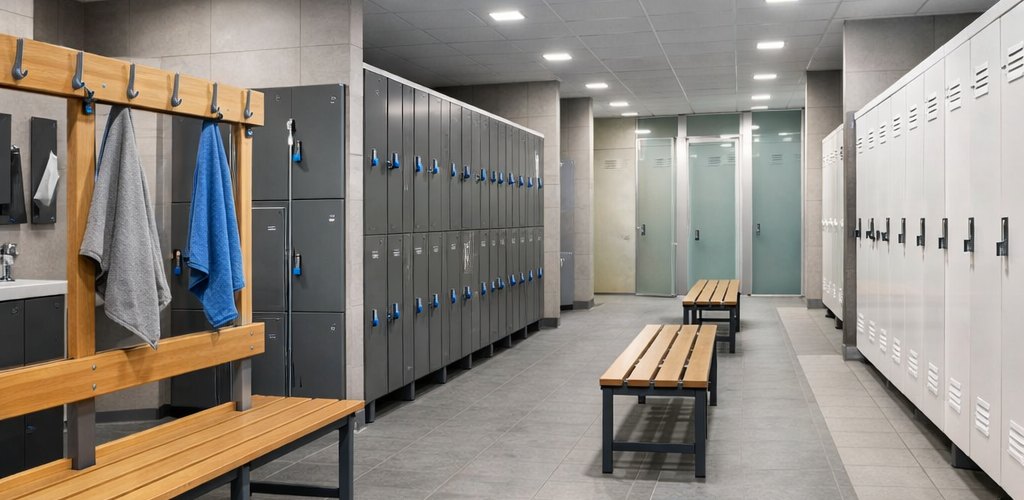
Good locker room design starts with the people using the room, what they need to store and how the space works when it is busiest. The aim is not simply to fit the maximum possible number of lockers against the available walls. Lockers, benches, changing areas and circulation routes need to work together when doors are open, people are sitting or changing, bags are on the floor and other users are moving through the room.
This UK locker room design guide explains the complete design process for workplaces, schools, factories, warehouses, gyms, leisure centres, sports facilities and other commercial changing areas. It covers locker selection, room layout, benches, capacity, security, wet and dry areas, accessibility, cleaning, maintenance and future use.
If you already know the number of users and are working out how many lockers the room requires, use our locker capacity planning guide. For detailed guidance on the clear working space between lockers, benches and other features, see the locker aisle width guide.
Quick Answer: How Do You Design a Locker Room?
Design a locker room by first identifying who will use it, what they need to store and how many people may use the room at the same time. Measure the complete usable space, record doors and fixed obstructions, decide whether lockers will be assigned or shared and choose locker sizes that suit the belongings being stored.
Then arrange the lockers, benches and circulation routes around realistic peak-time use. Check door opening space, user movement, security, accessibility, environmental conditions, cleaning, maintenance and installation access before the final locker specification is ordered.
What Is Locker Room Design?
Locker room design is the process of organising storage, changing facilities and movement within a room so that the space works for its intended users. In the UK the same type of space may also be described as a changing room, staff changing area, cloakroom or locker area.
A complete locker room design may need to consider:
- number and type of users;
- peak occupancy rather than average occupancy;
- personal belongings, clothing, uniforms or PPE being stored;
- locker quantity and compartment size;
- locker depth and overall footprint;
- assigned or shared locker use;
- locker materials and construction;
- lock and access-control systems;
- locker positioning;
- benches and changing space;
- door opening and standing space;
- circulation through the room;
- wet, dry, clean or dirty areas;
- accessible use;
- cleaning and hygiene;
- maintenance and replacement parts;
- delivery and installation access; and
- future changes in user numbers.
A locker room therefore needs to be treated as a working environment rather than simply as an empty room that needs to be filled with storage cabinets.
Locker Room Design Priorities
| Design issue | Question to answer | Why it matters |
|---|---|---|
| Users | Who will use the room? | Different users require different storage and changing arrangements. |
| Storage | What needs to go inside each locker? | Determines locker size, depth and configuration. |
| Capacity | How many people require storage? | Controls locker quantity and allocation. |
| Peak use | How many people may arrive together? | Influences congestion, layout and bench requirements. |
| Room layout | Where should lockers and benches go? | Controls access and circulation. |
| Environment | Is the room dry, humid or regularly wet? | Influences locker and bench materials. |
| Security | How should users secure their belongings? | Affects locks, keys, codes and administration. |
| Accessibility | Can different users approach and operate the storage? | Accessibility works best when considered from the beginning. |
| Maintenance | Can lockers and locks be reached and repaired? | Reduces long-term disruption and replacement costs. |
1. Start With the People Using the Locker Room
Before choosing a locker, define the user group. The correct design for an office is unlikely to be identical to a school changing room, factory locker room or leisure centre.
- How many people use the facility?
- How many are likely to be present simultaneously?
- Do they arrive gradually or in groups?
- Will they change clothing or only store belongings?
- Do they carry bags, coats, footwear, helmets or PPE?
- Do they need permanent individual lockers?
- Could some lockers operate as shared or day-use storage?
- Are visitors or contractors also likely to require storage?
This initial user assessment prevents a common design mistake: selecting lockers because they fit the room rather than because they fit the people using them.
2. Identify What Each Locker Needs to Store
Locker capacity is not just a door count. A smaller compartment may increase the number of users that can be accommodated within a locker run, but it will only be useful if the compartment is large enough for the belongings being stored.
| Storage requirement | Typical locker approach | Design consideration |
|---|---|---|
| Coats and hanging garments | Single-door or garment locker | Allow useful hanging height. |
| General bags and personal items | Single or two-tier locker | Check bag dimensions before specifying compartments. |
| Small personal belongings | Multi-tier locker | Higher user capacity where large storage is unnecessary. |
| Workwear and PPE | Industrial, garment or specialist locker | Bulky equipment may need additional depth or internal fittings. |
| Clean and used clothing | Clean/dirty or divided locker | Separation may be more important than maximum door count. |
| Wet-area belongings | Locker specified for the environment | Material must suit expected moisture exposure. |
Start with what actually needs to fit inside the locker and work backwards towards the most efficient configuration.
3. Work Out How Many Lockers You Need
There is no universal ratio between the number of people at a site and the number of lockers required. The correct quantity depends on how the facility operates.
- Assigned lockers: normally remain allocated to the same individual.
- Shared or day-use lockers: can potentially serve different users at different times.
- Shift-based facilities: may have fewer simultaneous users than the total workforce, although overlapping shifts need to be considered.
- Schools and sports facilities: can have concentrated groups arriving at once.
- Hybrid workplaces: may require less permanent storage if properly managed shared-use lockers are appropriate.
For the detailed capacity calculation, use our how many lockers do you need guide. It focuses specifically on locker quantities, peak demand, assigned storage and shared use.
4. Measure the Complete Locker Room
Do not estimate capacity from wall length alone. Record the complete room and everything that reduces the usable space.
- room length and width;
- available height;
- doors and direction of opening;
- windows and low sills;
- columns and structural projections;
- radiators and heaters;
- pipework and boxed services;
- electrical equipment;
- access panels;
- floor level changes;
- existing benches or fittings;
- routes to showers, toilets or other rooms; and
- areas that need to remain accessible for maintenance.
The important measurement is the usable room remaining after these fixed features have been taken into account. Locker depth, open doors, benches and people then reduce the available working space further.
5. Design for Peak Occupancy
A locker room should be assessed when it is busy, not when it is empty. Several users may be opening lockers, changing clothes, sitting on benches, handling bags and walking through the room at the same time.
| Environment | Typical concentrated use | Design concern |
|---|---|---|
| School | Lesson changes and sports sessions | Large groups entering and leaving together. |
| Factory or warehouse | Shift start and finish | Short periods of intensive locker and bench use. |
| Gym | Before and after popular sessions | High turnover and movement towards showers or activity areas. |
| Sports facility | Team arrival and departure | Group changing and bulky kit. |
| Office | Start and finish of the working day | Concentrated access to personal storage. |
If a design only works when every locker door is closed and nobody is sitting on a bench, it is unlikely to work well in normal use.
6. Arrange the Locker Room Around Movement
Once the room boundary, users and storage requirements are known, the lockers and benches can be arranged. Common options include single-wall runs, perimeter layouts, opposing locker banks and central back-to-back locker runs.
| Locker layout | Potential advantage | Main design check |
|---|---|---|
| Single-wall run | Simple and suitable for smaller rooms | Enough working space in front of the lockers. |
| Perimeter layout | Uses available wall space effectively | Corners, entrances and door interaction. |
| Opposing locker banks | Can provide substantial storage capacity | Both sides may be used simultaneously. |
| Central back-to-back banks | Efficient use of larger rooms | Access routes are needed around both sides and ends. |
| Zoned layout | Separates user groups or activities | Zones still need to connect logically. |
Test the proposed arrangement with locker doors open and users standing in front of the cabinets. Pay particular attention to entrances, corners, opposing rows and areas beside benches. Our locker aisle width and spacing guide provides more detailed guidance for these clear working areas.
7. Allow Working Space Around the Lockers
Locker dimensions are only part of the space requirement. Users also need room to approach the locker, open the door, stand in front of it, retrieve belongings and move away again.
The required space changes according to locker depth, door width, opposing locker runs, bench position, expected traffic and the users of the room. For this reason it is better to calculate the clear working space for the actual project rather than apply a single dimension to every locker room.
For practical planning dimensions and the factors that affect them, use our Locker Aisle Width Guide UK. Its figures are planning starting points rather than universal statutory minimums, so the final layout still needs to reflect the actual site, users and applicable requirements.
8. Include Benches Early in the Locker Room Design
Benches should be part of the initial layout rather than added after the lockers have been positioned. This is particularly important where users change footwear, workwear, uniforms or sports clothing.
- Position benches where people can sit without blocking the main route.
- Check that seated users do not prevent nearby locker doors from opening.
- Allow people to stand up and turn comfortably.
- Avoid placing a bench immediately inside a busy entrance.
- Consider where shoes, bags and clothing may temporarily be placed.
- Consider whether a single-sided or double-sided bench suits the layout.
- Choose bench materials that suit the expected environment.
Total Locker Service supplies changing room benches in different configurations for dry changing environments, including options suitable for use against walls or as freestanding seating.
9. Use Locker Room Zones Where They Improve the Design
Not every locker room needs formal zones, but larger or more complex facilities often work better when different activities are separated logically.
- Entrance zone: where users arrive and orientate themselves.
- Locker zone: secure personal storage.
- Changing zone: benches and changing activity.
- Circulation zone: movement through the room.
- Wet zone: routes associated with showers, pools or wet activity.
- Dry zone: areas intended to remain relatively dry.
- Clean and dirty zones: where workwear or operational requirements make separation useful.
- Accessible-use areas: lockers and changing facilities positioned for practical access.
For workplaces that need wet/dry, clean/dirty or PPE separation, see our detailed locker room zoning guide.
10. Match the Locker Material to the Environment
The room environment should be considered before a locker range is selected. A locker suitable for a dry office or school corridor may not be the best specification for an area exposed to persistent humidity, wet clothing or frequent water contact.
Consider:
- expected moisture levels;
- whether users bring wet clothing into the room;
- cleaning methods;
- temperature and ventilation;
- risk of impact or heavy use;
- appearance requirements;
- expected service life; and
- availability of replacement components.
For general commercial locker options for schools, workplaces, leisure facilities and managed environments, browse our commercial lockers.
11. Choose the Locker Locking System Before Ordering
The lock should reflect how the lockers will actually be managed. The cheapest or most technically advanced option is not automatically the best choice.
| Locker lock type | Typical application | Management issue |
|---|---|---|
| Key-operated lock | Assigned staff, school or workplace storage | Replacement keys and master-key control. |
| Hasp lock | Sites using user or site-supplied padlocks | Padlock policy and removal of abandoned locks. |
| Mechanical combination lock | Keyless assigned or shared use | Code reset and override procedures. |
| Coin lock | Leisure and public-use applications | Coin return or retain operation and management access. |
| Digital keypad lock | Assigned or shared electronic access | Programming, batteries and override procedures. |
| RFID lock | Managed electronic locker systems | Credential compatibility and administration. |
Compare the available options on our locker locks page. Choosing the lock before the locker order also gives the supplier an opportunity to confirm the correct door preparation and operating mode.
12. Build Accessibility Into the Initial Design
Accessibility should be considered while the room is being designed, rather than after all convenient locker positions have already been allocated.
- Consider the approach to the locker.
- Consider users with different reach ranges.
- Check the operating height and position of locks and handles.
- Consider the force and dexterity required to operate the selected lock.
- Avoid putting accessible storage in a difficult corner simply because space remains there.
- Consider the relationship between lockers, seating and changing facilities.
- Keep appropriate access routes clear.
- Use clear identification and numbering.
Individual projects may have specific building and accessibility requirements. Our locker accessibility and DDA planning guide provides more detailed locker-specific considerations. Project-specific compliance should be checked against the requirements that apply to the particular building and use.
13. Design for Cleaning and Maintenance
A locker room may remain in service for many years, so the design should allow routine cleaning and repair rather than only looking good on installation day.
- Allow cleaning access around the locker and bench layout.
- Avoid inaccessible dirt traps where possible.
- Consider how the floor will be cleaned.
- Make sure locks and hinges remain accessible for servicing.
- Use clear locker numbering so individual compartments can be identified.
- Plan how lost keys and lockouts will be managed.
- Check that replacement doors, locks and other components can be fitted without dismantling large sections of the room.
Total Locker Service supplies replacement locker parts, replacement locker locks and replacement locker keys for many commonly used locker systems.
14. Check Delivery and Installation Before Finalising the Design
A locker can fit perfectly into the proposed room but still be difficult to install if it cannot reach that room.
- Check external delivery access.
- Measure internal doorways and corridors.
- Check lifts, stairways and landings where applicable.
- Record tight corners and changes of direction.
- Consider whether lockers arrive assembled or require site assembly.
- Check wall and floor conditions.
- Identify skirting, pipes or projections that affect positioning.
- Consider how lockers or benches will be secured where required.
These checks are easier and less expensive before the equipment arrives on site.
Locker Room Design by Environment
Workplace Locker Rooms
Workplace locker room design depends heavily on what staff do during the working day. An office may only require storage for coats, bags, laptops or personal items, while an industrial facility may need staff to change clothing and store footwear, uniforms, helmets or PPE.
Shift changes can create a large temporary increase in occupancy, so workplace changing areas should be designed around the busiest period rather than the average number of people in the room. For product options, see our workplace lockers.
School Locker Rooms and Changing Rooms
Schools often need durable lockers, straightforward identification and layouts that can cope with groups of pupils arriving together. Bags, sports clothing, footwear and coats should be considered when choosing compartment sizes.
Clear routes and practical supervision can be more valuable than squeezing another small group of lockers into a congested room. View our school lockers for product options.
Gym and Leisure Locker Rooms
Gym and leisure changing rooms often combine high user turnover, bench use, changing activity and movement towards showers or other wet facilities. The complete user journey from entrance to locker, changing space and activity area should be considered rather than treating each element separately.
Where lockers or benches may be exposed to persistent moisture, select products specifically suited to the expected conditions.
Industrial Locker Rooms
Industrial changing rooms may need to accommodate workwear, boots, PPE, high-visibility clothing and personal belongings. This can make usable locker volume more important than maximum compartment numbers.
Where clean clothing and used workwear need to be separated, incorporate that requirement into the room design from the beginning rather than attempting to adapt a standard locker layout afterwards.
Common Locker Room Design Mistakes
- Choosing lockers before defining the users and storage requirements.
- Calculating capacity from wall length alone.
- Trying to maximise locker numbers at the expense of usability.
- Choosing compartments that are too small for the belongings being stored.
- Planning for average use instead of peak occupancy.
- Ignoring locker door opening space.
- Adding benches after the locker layout has been finalised.
- Putting heavily used lockers immediately beside entrances.
- Creating narrow dead-end routes.
- Failing to consider wet and dry movement.
- Choosing materials without considering the room environment.
- Selecting a lock without considering administration and override requirements.
- Treating accessibility as a late-stage adjustment.
- Ignoring cleaning and maintenance access.
- Failing to check the delivery route.
- Designing solely for current user numbers when future growth is likely.
Locker Room Design Process: A Practical Checklist
- Define the people who will use the locker room.
- List the belongings, clothing or equipment that need to be stored.
- Establish peak simultaneous occupancy.
- Decide whether lockers will be assigned, shared or a mixture of both.
- Calculate the approximate locker quantity required.
- Measure the complete room and all fixed obstructions.
- Choose suitable locker sizes and materials.
- Map the main user route through the space.
- Position the main locker banks.
- Add benches and changing areas.
- Check working space around open lockers.
- Check entrances, corners and other potential bottlenecks.
- Consider wet, dry, clean or dirty zones where appropriate.
- Incorporate accessibility requirements.
- Select the locking system and management method.
- Check cleaning and maintenance access.
- Check delivery and installation routes.
- Review the design again assuming the room is at peak occupancy.
Detailed Locker Room Planning Guides
This page provides the overall locker room design process. The specialist guides below cover individual planning questions in greater detail:
- How Many Lockers Do You Need? Locker Capacity Planning Guide
- Locker Aisle Width Guide UK: Safe and Practical Locker Room Spacing
- Locker Room Zoning Guide UK: Layout, Flow and Clean/Dirty Separation
- Locker Accessibility and DDA Planning UK
Need Help Planning a Locker Room?
Total Locker Service supplies lockers, changing room benches, locker locks, replacement keys and spare parts for schools, workplaces, leisure facilities, healthcare sites and other commercial environments throughout the UK.
We can assist with locker selection and practical layout planning based on the room, user numbers, storage requirements and intended environment. Providing room dimensions, photographs, existing drawings and details of what users need to store can make it easier to identify suitable options.
Locker Room Design FAQs
How do you design a locker room?
Start by identifying the users, what they need to store and how many people may use the room simultaneously. Measure the complete room, choose suitable locker sizes and materials, then arrange lockers, benches and access routes around realistic peak-time use. Check security, accessibility, cleaning, maintenance and installation before finalising the design.
What is the most important part of locker room design?
The most important factor is designing around the people using the room. Locker size, quantity, benches, circulation and locking systems should reflect what users store and what happens during the busiest period rather than simply maximising the number of locker doors.
How many lockers should a locker room have?
There is no universal number. Locker quantity depends on user numbers, peak simultaneous occupancy, whether storage is assigned or shared, shift patterns, visitor demand and the amount of space each person needs. Compartment size should be considered alongside the total number of lockers.
How much space should be left in front of lockers?
The required space depends on locker depth, door width, opposing locker runs, benches, user numbers and circulation requirements. The important measurement is the clear usable space remaining when locker doors are open and people are using the room. Project-specific spacing should therefore be checked rather than applying one dimension to every locker room.
Do locker rooms need benches?
Not always. A simple personal-storage area may require little or no seating. Benches are more important where users regularly change clothes, footwear, uniforms, workwear or sports kit. Where benches are required, they should be included in the layout from the beginning.
Should a locker room be designed for peak occupancy?
Yes. Schools, workplaces, gyms and sports facilities can experience short periods when many users access lockers at the same time. The proposed layout should be checked with multiple locker doors open, benches occupied and people moving through the room simultaneously.
Are steel lockers suitable for every locker room?
No. Steel lockers are suitable for many dry internal environments, but locations exposed to significant moisture or regular water contact may require a different locker material or specification. The product should always be matched to the actual environment.
When should the locker lock type be chosen?
The locking system should be chosen before the final locker order. The lock affects whether storage is assigned or shared, how keys or codes are administered, override procedures, maintenance requirements and the preparation required in the locker door.
How should you check a locker room design before installation?
Review the proposed room as if it were already in use. Check entrances, open locker doors, benches, circulation routes, changing areas, accessible use, cleaning access and maintenance points. Then repeat the assessment assuming the room is being used by the expected peak number of people.
Discover more from Blog Total Locker Service
Subscribe to get the latest posts sent to your email.