Changing Room Bench Installation & Fixing Guide UK
September 15, 2026
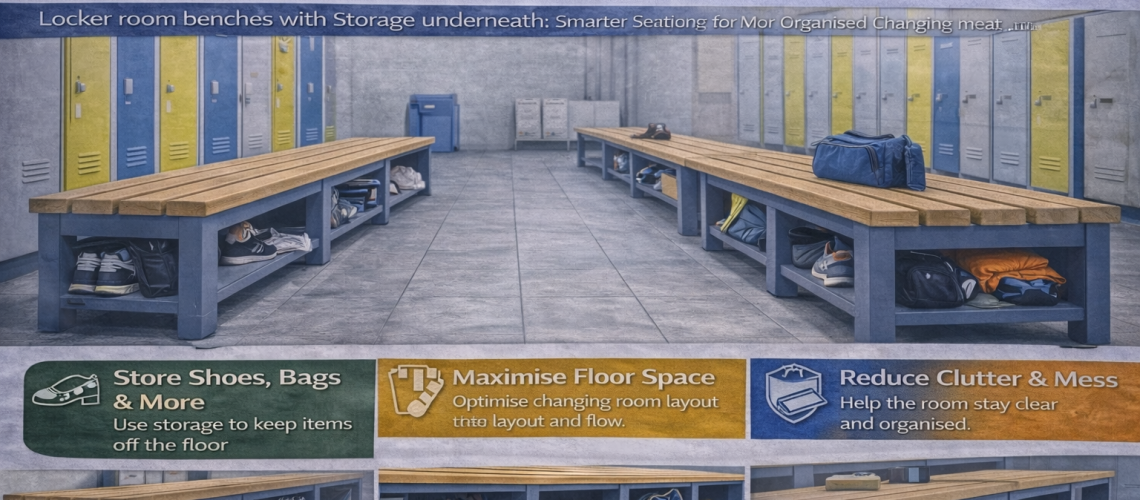
Changing room bench installation is the stage where a good seating specification becomes a safe, stable and practical part of the finished room. Even a correctly selected bench can perform poorly if it is positioned on an uneven floor, fixed into an unsuitable wall, installed over hidden services, misaligned with neighbouring seats or placed where it obstructs lockers, doors or cleaning access.
Bench installation therefore needs more than simply putting the seating in the intended location. The installer needs to confirm the final layout, identify the bench fixing method, assess the floor or wall construction, check for concealed services, establish accurate levels and ensure the completed seating remains stable under normal use.
This UK guide focuses specifically on changing room bench installation and fixing, including freestanding benches, floor-fixed seating, wall-mounted benches, single-sided and double-sided seating, benches with hook boards, uneven floors, wet changing rooms, setting out, commissioning and future maintenance.
If you are still deciding which type of bench to purchase, use our guide to choosing changing room benches. For products, browse the complete changing room bench seating range.
Quick Answer: How Should Changing Room Benches Be Installed?
Changing room benches should be installed in accordance with the bench manufacturer’s instructions and the conditions of the actual site.
Before installation:
- confirm the final bench positions;
- confirm the correct bench model and fixing method;
- check the floor level and condition;
- check the construction of any wall being used for support;
- identify concealed cables, pipes and other services before drilling;
- check door, locker and circulation clearances;
- confirm whether adjustable feet, floor brackets or wall fixings are required;
- assemble the seating correctly where supplied in component form;
- level and align adjoining benches;
- tighten all structural connections and approved fixings;
- inspect the completed installation before use.
There is no single fixing method suitable for every changing room bench. A freestanding bench, wall-mounted bench, double-sided central seat and wet-area plastic bench can all require different installation decisions.
Bench Installation Starts Before Delivery
The easiest installation problems to solve are the ones identified before the benches reach site.
A pre-installation check should confirm:
- bench type;
- bench length;
- seat depth;
- seat height;
- overall depth where hook frames or back structures are fitted;
- number of bench units;
- whether seating is single- or double-sided;
- whether shoe trays are included;
- whether hook boards are integrated;
- whether the bench is freestanding, wall-mounted or intended to be fixed;
- whether the product arrives assembled or requires assembly;
- the final room layout.
Check the actual ordered product rather than assuming all benches in the range have identical dimensions or installation requirements.
Total Locker Service supplies freestanding changing room bench seats, wall-mounted bench seating, double-sided benches, hook-board seating and plastic benches for wet changing rooms.
Confirm the Final Layout Before Fixing Anything
Do not permanently fix benches until the completed room arrangement has been checked against the actual building.
Drawings may not reflect:
- skirting projections;
- boxed pipework;
- radiators;
- floor drains;
- columns;
- uneven walls;
- changes in floor level;
- door stops;
- access panels;
- later alterations by other trades.
Set the benches temporarily into their proposed positions before drilling or final anchoring where practical. Confirm that the room still works with the real products rather than only the drawing.
Detailed bench selection and room spacing are covered elsewhere. If the final site conditions have changed the available clearances, use the Locker Aisle Width Guide UK and Locker Room Design UK guide before fixing the seating permanently.
Identify the Bench Fixing Method
The first installation decision is whether the seating is intended to remain freestanding or needs structural restraint.
| Bench arrangement | Typical installation approach | Main site check |
|---|---|---|
| Freestanding bench | Position, level and assemble as specified | Floor condition and stability |
| Freestanding bench with optional floor brackets | Secure through approved brackets where required | Floor construction and hidden services |
| Wall-mounted bench | Structurally secure to a suitable supporting wall | Wall construction and fixing capacity |
| Single-sided hook bench | Position or fix according to product configuration | Vertical stability and wall relationship |
| Double-sided central bench | Level, align and secure where specified | Central floor fixing and all-round stability |
| Wet-area plastic bench | Freestanding or fixed according to product and site | Drainage, floor penetration and corrosion-resistant components |
The manufacturer or supplier should be consulted where the required installation method is uncertain. Do not invent an alternative fixing arrangement simply because the specified fixing is inconvenient on site.
Check the Floor Before Bench Installation
A changing room floor may look level without being sufficiently even for a long bench run.
Before setting out the seating, check:
- finished floor level;
- local high and low points;
- changes between floor finishes;
- slopes towards drains;
- damaged or hollow floor finishes;
- raised floor construction;
- underfloor heating;
- waterproof membranes;
- known concealed services.
These conditions affect both levelling and the suitability of floor fixings.
A fixing suitable for a sound concrete floor may not be suitable for a raised access floor, thin screed, suspended floor or floor containing services. The installer should establish what the structural fixing is actually engaging with.
Bench Levelling on Uneven Floors
Benches should sit level and stable unless the particular product or site design specifies otherwise.
Uneven floors can cause:
- rocking;
- uneven loading between legs;
- visible misalignment between adjoining benches;
- stress in bolted connections;
- poor appearance across long bench runs;
- movement during use.
Some Total Locker Service bench ranges are available with adjustable feet, allowing small floor-level variations to be corrected without forcing the frame out of square.
Where adjustable feet are provided, use them within the intended adjustment range and recheck that all feet carry the bench correctly. Do not leave a central or end leg suspended above the floor simply because the seat appears visually level.
Major floor defects should be addressed as a building issue rather than compensated for with improvised packing beneath the bench.
Check for Concealed Services Before Drilling
Floor-fixed and wall-mounted bench installations can require drilling into the building fabric. Before any hole is drilled, establish whether electrical cables, pipes or other services may be hidden in the proposed fixing area.
The Health and Safety Executive specifically warns that electrical cables can be concealed within walls, floors and ceilings and should be considered before drilling.
- Check available building and service drawings.
- Ask the building or facilities manager about known services.
- Look for sockets, switches, radiators, sanitary fittings and other indications of nearby services.
- Use appropriate detection procedures and equipment where required.
- Do not assume a clear wall surface means the area behind it is clear.
- Stop if the construction or service location is uncertain.
For current electrical-safety guidance, see the Health and Safety Executive electrical safety guidance.
Consider Asbestos Before Drilling Existing Buildings
Older changing rooms and refurbishment projects can present another issue: drilling may disturb building materials that contain asbestos.
Before bench installation work disturbs walls, panels, floor materials or other existing building fabric, the responsible parties should establish whether asbestos information is relevant to the work.
This is particularly important in older schools, leisure centres, hospitals, industrial buildings and public-sector properties.
HSE guidance specifically includes drilling into walls as work that can require asbestos-related checks. See HSE asbestos safety guidance.
Installing Freestanding Changing Room Benches
A freestanding changing room bench is normally the simplest seating arrangement because it does not rely on a wall for structural support.
However, freestanding does not mean installation checks can be ignored.
- Confirm all frame components are assembled correctly.
- Check the seat slats or seating surface are securely attached.
- Position the bench on a sound floor.
- Level all feet.
- Check for rocking or movement.
- Check that the frame has not twisted during assembly.
- Confirm the bench remains in the intended position during normal use.
- Install optional floor restraints where specified for the project.
Freestanding seating is useful where the room layout may need some future flexibility, but a project can still choose floor fixing where movement of the bench would create operational problems.
When Should a Freestanding Bench Be Floor Fixed?
There is no rule that every freestanding bench must be anchored to the floor. The decision depends on the product, manufacturer instructions, expected use and site requirements.
Floor fixing may be considered where:
- the project specification requires permanent positioning;
- users could repeatedly move the seating;
- the bench has a tall integrated hook frame;
- the location is subject to heavy or robust use;
- a central bench needs to remain aligned;
- the manufacturer provides a floor-fixing option.
Several Total Locker Service bench ranges offer optional floor-fixing brackets. The appropriate fixing into the building floor still depends on the actual substrate.
Floor-Fixing Bench Seating
Where the bench is to be anchored to the floor, first establish the fixing locations from the approved bench brackets or frame rather than drilling approximately beside the legs.
A typical installation sequence is:
- Position the fully assembled or correctly aligned bench.
- Check the bench is level.
- Confirm final room clearances.
- Mark the fixing positions accurately.
- Move the bench if required for safe drilling access.
- Confirm the drilling area is clear of concealed services.
- Drill using the method appropriate to the substrate and specified fixing.
- Clean the fixing hole as required by the fixing manufacturer’s instructions.
- Return the bench to position.
- Install and tighten the approved fixings.
- Recheck level and stability.
The required fixing size, embedment and anchor type should come from the bench/fixing specification and the supporting floor construction. This guide does not substitute one universal anchor for all floors.
Installing Wall-Mounted Changing Room Benches
Wall-mounted bench seating can leave the floor beneath the seat clear, which can be useful where cleaning access and an uncluttered floor are priorities.
Its installation is more dependent on the building structure than a freestanding bench because the wall has to support the seating and the loads generated during use.
Before installing a wall-mounted bench, establish:
- what the wall is constructed from;
- whether the proposed fixing position provides suitable structural support;
- whether studs, structural rails or reinforcement are present where required;
- whether the wall has a decorative lining or tile over the structural substrate;
- whether services run within or behind the wall;
- the intended seat height;
- the manufacturer’s bracket spacing and fixing requirements.
Do not assume that plasterboard, wall panelling or tiles alone provide adequate structural support simply because the bench bracket can be screwed to the visible surface.
Where the wall construction is uncertain, obtain competent building or structural advice before installation.
Setting Out a Wall-Mounted Bench
Accurate setting out is particularly important with wall-mounted seating because the fixing positions determine the final height and alignment of the complete bench run.
- Establish the finished floor level.
- Mark the required seat height.
- Use a suitable level or laser to transfer the datum across the wall.
- Mark bracket centres from the actual product specification.
- Check the complete run before drilling.
- Allow for wall irregularities.
- Check ends against corners, doors and adjacent fittings.
- Check that the bench remains level even where the floor falls slightly.
Do not measure every bracket independently from an uneven floor. Establishing one reliable datum can prevent a long bench run from following local floor variations and appearing visibly stepped.
Fixing Wall-Mounted Benches to Different Wall Types
| Wall construction | Main installation consideration |
|---|---|
| Solid masonry | Confirm masonry condition, fixing specification and concealed services |
| Concrete | Use the specified structural fixing and confirm service locations |
| Stud partition | Bench loads need suitable structural support rather than reliance on board alone |
| Tiled wall | Fix through the finish into the appropriate supporting structure without unnecessary tile damage |
| Panelled wall | Identify what structure lies behind the panel and whether it can support the bench |
| Unknown construction | Investigate before drilling or specifying a fixing |
The same wall finish can conceal very different structural conditions, so visible appearance should not be used as the fixing specification.
Single-Sided Benches With Integrated Hook Boards
A single-sided bench with an integrated hook board combines seating with a taller coat-hook frame.
The additional height changes the installation check because the bench has a larger structure above the seat and may be more sensitive to movement or poor alignment.
- Assemble the upright frame squarely.
- Check cross-members are correctly fitted.
- Confirm hook rails are level.
- Check all supplied frame fasteners.
- Confirm the bench stands vertically rather than leaning towards or away from the wall.
- Install floor restraints where specified.
- Check coat hooks are fully secured.
Do not use the hook-board frame as a substitute for a handrail or structural barrier unless the product is specifically designed for that function.
Double-Sided Bench Installation
Double-sided bench seating is commonly used as a central seating island where users can sit on both sides.
Because the bench is exposed on both sides, straight alignment and stability are particularly noticeable.
During installation:
- establish the centre line of the bench run;
- position units consistently along that line;
- check both sides remain parallel to surrounding locker banks;
- level every leg or foot;
- align adjoining seating surfaces;
- check end-to-end gaps;
- use approved floor-fixing brackets where specified;
- recheck the entire bank after fixing.
Small alignment errors become visually obvious over a long central bench run, particularly when lockers or floor tiles provide strong parallel lines nearby.
Double-Sided Benches With Hook Boards
A double-sided bench with coat hooks adds a tall central frame to the seating island.
Total Locker Service offers adjustable feet and floor-fixing bracket options on relevant seating within this range.
Installation should pay particular attention to:
- vertical alignment of the centre frame;
- equal seat positioning on both sides;
- floor level beneath all legs;
- correct tightening of frame connections;
- stability when the coat hooks are being used;
- straight alignment of multiple units;
- specified floor restraint.
Installing Benches With Shoe Trays
Changing room benches with shoe trays introduce another component beneath the seat that needs to remain correctly aligned and accessible.
- Install the tray at the specified height.
- Check it is supported correctly at all intended points.
- Make sure the tray does not contact the floor on uneven surfaces.
- Keep access available for cleaning around and beneath it.
- Check footwear can be inserted without obstruction from brackets or wall projections.
- Ensure the tray does not interfere with floor-fixing brackets.
Do not use a shoe tray as a structural brace unless the bench manufacturer identifies it as one.
Installing Plastic Bench Seating in Wet Changing Rooms
Plastic bench seating is designed for moisture-prone environments such as swimming pools, wet changing rooms and wash-down areas, but the installation still needs to respect the building’s water-management system.
Before drilling or fixing in a wet changing room, check:
- floor falls;
- drainage channels;
- waterproof membranes;
- underfloor services;
- sealants or penetration requirements;
- cleaning routes;
- whether the specified fixing components are appropriate for the environment.
Floor fixings should not unnecessarily create water traps or compromise a waterproofing system. Where penetrations affect tanking, membranes or another specialist finish, coordinate the fixing method with the relevant building or waterproofing contractor.
For the wider wet-room planning subject, use our Changing Room Layout Guide: Wet vs Dry Areas UK.
Installing Bench Runs Against Walls
Even freestanding benches positioned against a wall need careful setting out.
Walls are not always straight. Long bench runs can reveal bows, steps and projections that were not obvious in an empty room.
- Check the wall line before positioning several benches.
- Do not force the seating to follow a badly uneven wall.
- Maintain usable clearance from skirting and wall projections.
- Keep access to sockets, valves and service panels where required.
- Avoid trapping pipes behind seating where they need maintenance.
- Keep the front edge of adjoining benches aligned.
Where the wall is substantially out of true, the cleanest installation may be to establish a straight bench line independent of minor wall variations.
Installing Several Benches as One Continuous Run
A long bank of seating should be treated as one installation rather than a collection of unrelated benches.
Set out the complete run first.
- Establish the start and finish points.
- Confirm the total combined bench length.
- Allow appropriate end clearances.
- Establish a common front line.
- Establish a common seat level.
- Check gaps between individual units.
- Confirm any floor-fixing positions do not conflict with services.
- Fix progressively while rechecking alignment.
Do not fix the first bench permanently and then discover that accumulated dimensional or wall variations push the final bench into a doorway or other feature.
Bench Installation Around Lockers
Changing room benches are frequently installed alongside locker banks, so the final installation needs to preserve the planned relationship between the two systems.
Before permanent fixing, check:
- locker doors can open as intended;
- bench frames do not project into locker access;
- users can stand up from the bench without striking open doors;
- bench ends do not create a tight route around locker-bank ends;
- shoe trays do not obstruct lower locker access;
- the bench can still be cleaned and maintained.
This article deliberately does not repeat detailed spacing recommendations. If site installation changes the intended positions, recheck the room using the specialist spacing guide before fixing the benches.
Installing Benches Near Doors and Entrances
Bench ends near room entrances can become impact points or local bottlenecks if the installation drifts from the agreed layout.
- Check the full swing of room doors.
- Check door closers and handles.
- Keep door stops accessible.
- Do not cover access-control equipment.
- Check people can enter while the nearest bench is occupied.
- Keep required routes clear.
Measure from the finished bench frame rather than only the seat slat because legs, hook frames and brackets may project further than the seating surface.
Bench Installation in Schools
School changing rooms place seating under frequent group use. Installation quality therefore matters because loose frames, rocking legs and damaged fixings can quickly become maintenance problems.
When installing school changing-room benches:
- follow the specified fixing and restraint method;
- check all exposed fasteners are properly fitted;
- confirm bench ends do not create unnecessary obstructions;
- inspect tall hook-board frames carefully;
- use the approved floor-fixing system where required;
- make future inspection straightforward.
Bench Installation in Workplace and Industrial Changing Rooms
Factories, warehouses and industrial changing rooms may use benches heavily during concentrated shift changes.
The installation needs to account for:
- repeated daily use;
- boots and heavy footwear;
- bags and PPE around the seating;
- cleaning equipment;
- floor contamination or wet footwear;
- impact from robust daily activity.
A secure, level installation is generally more important than preserving unnecessary future movement of the seating where the operational layout is intended to remain permanent.
Do Not Fix Through a Finished Floor Without Checking the Consequences
A floor fixing penetrates more than the visible floor finish.
Below tiles, resin, vinyl or other surfaces there may be:
- screed;
- waterproofing;
- underfloor heating;
- electrical services;
- pipework;
- structural concrete;
- raised-floor systems.
Confirm what lies beneath the finished surface before choosing the drilling depth or anchor system.
Coordinate Bench Installation With Other Trades
Changing-room benches are often installed as part of a larger fit-out involving lockers, flooring, decoration, showers, plumbing and electrical work.
The programme should avoid installing finished seating too early where later work could damage it.
- Complete major wet trades first where practical.
- Confirm finished floor levels.
- Allow wall decoration or tiling to be completed where required.
- Confirm electrical and plumbing services before drilling.
- Coordinate locker and bench positions.
- Protect installed benches from subsequent building work.
On live sites, phase the installation so tools, fixings, packaging and incomplete benches do not remain within areas being used by staff, pupils or members of the public.
Step-by-Step Changing Room Bench Installation Process
- Check the order. Confirm bench type, dimensions, finish, accessories and fixing options against the project specification.
- Inspect the delivery. Check frames, seats, brackets and accessories for transport damage before installation.
- Confirm the final room layout. Check the actual site against the approved drawing.
- Identify the installation method. Confirm whether each bench is freestanding, floor-fixed, wall-mounted or uses another manufacturer-approved arrangement.
- Check building construction. Establish the floor or wall substrate supporting any structural fixing.
- Check concealed services. Review available information and use appropriate detection procedures before drilling.
- Check the finished floor. Identify level variations, drains, membranes and local defects.
- Assemble the bench. Follow the supplied product instructions and use the correct components.
- Position the bench. Place it in the final location before permanent fixing.
- Set the level. Adjust approved feet or positioning as required.
- Align the run. Check adjoining benches, front edges and seat heights.
- Recheck room operation. Confirm doors, lockers, entrances and maintenance access.
- Mark fixing positions. Use the actual approved bracket or frame locations.
- Drill safely. Follow the specified drilling and fixing procedure for the substrate.
- Install the fixings. Tighten them in accordance with the relevant product and fixing instructions.
- Recheck alignment. Fixing can pull a frame out of level if the floor or wall is uneven.
- Inspect all connections. Confirm seats, frames, hook boards, shoe trays and accessories are secure.
- Clean the installation. Remove drilling dust, packaging and installation debris.
- Commission the bench. Check stability and complete the final inspection before opening the room for use.
Commissioning the Completed Bench Installation
Bench installation should finish with a deliberate inspection rather than simply leaving the room after the final fixing is tightened.
Check:
- the bench is stable;
- all feet contact the floor correctly;
- the seating surface is level;
- frames are square;
- wall-mounted brackets are secure;
- floor-fixing brackets are properly installed;
- bolts and structural fasteners are tightened;
- hook rails are secure;
- shoe trays are correctly fitted;
- no sharp or unfinished fixing points remain exposed;
- the bench has not moved into a door or locker clearance;
- drilling debris has been removed;
- the area is ready for normal cleaning.
Bench Installation Handover
For larger commercial installations, the handover should make future management easier.
Useful information can include:
- bench model and supplier;
- location of installed units;
- manufacturer instructions;
- fixing information where relevant;
- spare components supplied with the project;
- recommended cleaning information;
- warranty information;
- future inspection requirements.
Retain this information with the changing-room or facilities records rather than discarding it with the packaging.
Future Inspection and Maintenance
Bench fixings and frames should be included in the facility’s normal condition inspections.
Look for:
- loose structural fixings;
- movement at wall brackets;
- rocking feet;
- loose seat slats;
- damaged frame connections;
- bent brackets;
- loose hook boards;
- missing hooks;
- corrosion or material deterioration;
- damage caused by impact or misuse.
A loose bench should be investigated rather than repeatedly tightened without understanding why movement has developed.
Total Locker Service provides locker and changing-room equipment servicing and can assist with replacement components and refurbishment where appropriate.
Common Changing Room Bench Installation Mistakes
- Fixing the benches before checking the finished room. Site conditions may differ from the drawing.
- Assuming every floor fixing works in every substrate. Floor construction must be established first.
- Drilling before checking for hidden services. Electrical cables and pipes may be inside walls or floors.
- Ignoring asbestos information in older buildings.
- Using a wall-mounted bench on an unsuitable partition. The supporting wall needs to carry the seating loads.
- Following an uneven floor with a wall-mounted bench. Establish a proper level datum.
- Using improvised packing under bench feet. Use the intended levelling system or correct the underlying problem.
- Leaving some feet unloaded. All intended support points should function correctly.
- Fixing one bench before setting out the complete run. Errors can accumulate across several units.
- Forcing a bench to follow a crooked wall.
- Failing to recheck locker-door clearance after installation.
- Drilling through waterproofing without coordination.
- Blocking drains or access panels.
- Installing shoe trays where they trap debris or prevent cleaning.
- Leaving tall hook-board benches inadequately stabilised.
- Installing benches before dirty building work is complete.
- Failing to inspect bolts and fixings before handover.
Changing Room Bench Installation Checklist
- Correct bench model delivered?
- Correct bench length?
- Correct accessories?
- Manufacturer instructions available?
- Final layout confirmed?
- Floor condition checked?
- Wall construction checked where relevant?
- Concealed services considered?
- Asbestos information checked where relevant?
- Floor fixing method confirmed?
- Wall fixing method confirmed?
- Waterproofing or membranes identified?
- Bench assembled correctly?
- Bench level?
- All feet carrying correctly?
- Continuous runs aligned?
- Wall-mounted units at consistent height?
- Locker doors clear?
- Room doors clear?
- Drainage clear?
- Access panels clear?
- Hook-board frames secure?
- Shoe trays secure?
- All structural fasteners tightened?
- Floor or wall fixings checked?
- Installation debris removed?
- Completed seating inspected before use?
Relevant Bench Seating Products and Guides
- Changing Room Bench Seating UK
- Pure Changing Room Benches for Dry Areas
- Freestanding Changing Room Bench Seats
- Wall-Mounted Bench Seating
- Double-Sided Changing Room Benches
- Single-Sided Benches With Hook Boards
- Double-Sided Benches With Hook Boards
- Changing Room Benches With Shoe Trays
- Plastic Bench Seating for Wet Changing Rooms
- How to Choose Changing Room Benches UK
- Locker Room Benches With Storage Underneath
- Changing Room Layout Guide: Wet vs Dry Areas UK
- Locker Room Design UK
Changing Room Bench Installation FAQs
Do changing room benches need to be fixed to the floor?
Not every changing room bench requires floor fixing. Some products are designed to be freestanding, while others offer optional or specified floor-fixing brackets. The correct approach depends on the bench design, manufacturer instructions, site specification and expected use.
How do you fix a changing room bench to the floor?
Position and level the bench, identify the approved fixing locations, check for concealed services and confirm the floor construction before drilling. Use the fixing method specified for the bench and supporting substrate. There is no single floor anchor suitable for every installation.
Can a changing room bench be fixed to a plasterboard wall?
A wall-mounted bench needs suitable structural support. The visible plasterboard should not automatically be assumed to provide that support. The partition construction and available reinforcement should be assessed before the fixing method is chosen.
How are wall-mounted changing room benches installed?
Establish the finished seat height and bracket positions, confirm that the supporting wall is suitable, check for concealed services and install the manufacturer’s brackets using fixings appropriate to the structural substrate. The completed bench should then be checked for level and stability.
Can changing room benches be installed on uneven floors?
Small variations may be accommodated where the bench provides an approved adjustable-foot system. Significant floor defects should be assessed and corrected appropriately rather than using improvised packing or leaving bench legs unsupported.
Should you check for cables before fixing a bench?
Yes. Electrical cables and other services can be concealed within walls, floors and ceilings. The drilling area should be checked before structural fixings are installed.
Can benches be floor fixed in wet changing rooms?
They can be where the bench and project specification permit it, but the installation needs to account for drainage, waterproof membranes, floor construction and appropriate fixing components. Penetrating a waterproofing system should be coordinated with the relevant building specification.
How should double-sided changing room benches be installed?
Establish the centre line of the bench run, level all support points, align adjoining units and secure the seating using the specified fixing or restraint method where required. Recheck the complete central run after fixing.
Do benches with coat hooks need extra fixing?
Tall benches with integrated hook frames should be installed according to the manufacturer’s stability and fixing requirements. Some ranges offer floor-fixing brackets. The additional frame height makes correct assembly, levelling and stability particularly important.
Can several changing room benches be installed as one run?
Yes. Set out the complete run before fixing individual benches, establish a common front line and seat level, then align and secure each unit progressively. This prevents small errors accumulating across the installation.
Should bench fixings be checked after installation?
Yes. The completed installation should be inspected before use and bench frames, wall brackets, floor fixings, seats, hook boards and other structural components should form part of future condition checks.
Who should install wall-mounted changing room benches?
The installer needs the competence to identify the relevant wall construction, use the specified fixing system safely, check for concealed services and follow the manufacturer’s installation requirements. Where the supporting structure is uncertain, obtain appropriate specialist advice.
Install Changing Room Benches as Part of the Building
A changing room bench may be a relatively simple item of furniture, but once it is wall-mounted or floor-fixed it becomes closely connected to the building around it. The quality of the finished installation therefore depends on both the bench and the substrate supporting it.
Confirm the final layout before drilling, identify the floor or wall construction, locate concealed services, use the intended fixing system and keep the completed seating level and stable. On long bench runs, establish common alignment before permanently fixing individual units.
Where wall-mounted or wet-area benches are involved, pay particular attention to structural support, waterproofing, drainage and future cleaning access.
Total Locker Service supplies changing room bench seating for schools, workplaces, factories, gyms, leisure centres, sports facilities, swimming pools and commercial changing rooms throughout the UK, including freestanding, wall-mounted, single-sided, double-sided and wet-area seating.
Discover more from Blog Total Locker Service
Subscribe to get the latest posts sent to your email.